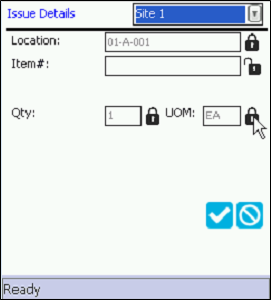
Rapid Issue Details
When you add a record from the Rapid Issue Details form, you are able to consecutively add items to the stock issue. You are also able to lock the Location, Item, Quantity and Unit of Measure field with a value so that you do not have to continually scan it.
Important: To use the Rapid Issue Details form, the option must be turned on at the User Preferences form.
Rapid Stock Issue
The rapid issue feature is designed to accelerate stock item issue. It uses a field lock feature and it enables you to continually scan the items until the item issue is complete.
To add an item to the order by using the Rapid Issue form, follow the steps below.
- Site: The default site of the logged-in user is automatically entered into this field. If you wish, select another site from which to issue the item.
- Location: Enter the location from which to issue the item. If you will be issuing multiple items from this location, you have the option to lock the location so that you do not have to continually scan it during the item issue. To lock the location, tap the Lock icon. The location will remain locked while items are issued.
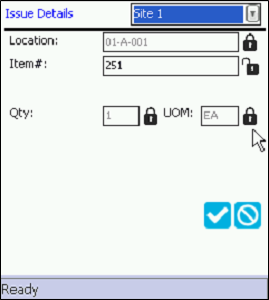
- Item#: Enter the item (entering the alternate item number will also display the item number) to issue in this field. If you are issuing this item from multiple locations, you have the option to lock the item so that you do not have to continually scan it during the item issue. Tap the Lock icon to lock the item number. The item will remain locked while items are issued.
- Lot, Expiration Date, Serial Number: When you select an item that requires a lot, an expiration date, or a serial number, you must enter this information for the item in the respective field.
- Serial Number: For more information about entering serial numbers for the item, see "Serialized Items".
- Lot: Enter the lot number in the lot field. If you are issuing multiple items with this lot number, you have the option to lock the lot so that you do not have to continually scan it. To lock the Lot while scanning this item, tap the Lock icon to the right of this field.
- Expiration Date: Enter the expiration date in the expiration date field. If you are issuing multiple items with this expiration date, you have the option to lock the expiration date so that you do not have to continually scan it. To lock the expiration date while scanning this item, tap the Lock icon to the right of this field.
- RFID Tag Number (if applicable): When you select an item that uses RFID, an RFID Tag Number field appears and you may enter the RFID tag number(s) in this field; see "RFID Item in Mobile App" for more information.
- Item Description: If the item contains a description, the item description will appear underneath the Item# field.
- Qty: Enter the quantity of the item that is being issued. If you are issuing multiple items with this quantity, you have the option to lock the quantity. To lock the quantity, tap the Lock item to the right of this field.
- If using the default issue quantity orders preference setting, the default quantity will automatically be entered and locked in this field; see "User Preferences" for more information.
- UOM: If using multiple units of measure, enter the item unit of measure in this field. If you are receiving multiple items with this unit of measure, you have the option to lock the unit of measure so that you do not have to continually scan it. To lock the unit of measure, tap the Lock icon to the right of this field.
- Save icon:
 click to add this item to the order. The form clears, indicating this item has been added to the order.
 - Continue scanning the items for this Issue order.
- When you are finished adding items to this order, tap the
 Cancel icon. You are returned to the Issue form\Details tab. The items have been added to this order.

- Tap the Save icon to issue the items and close the order.